Starting the Authentication Process
Starting the Authentication Process
When you start the authentication process, you must specify the user who is to be authenticated. You then retrieve the authentication challenge(s) and subsequent mechanism(s) that the user must answer. You start the process by invoking the /Security/StartAuthentication endpoint from your client application:
POST https://ABC1234.my.centrify.net/Security/StartAuthentication


X-CENTRIFY-NATIVE-CLIENT:true
Content-Type: application/json


{
   "TenantId": "ABC1234",
   "User": "mr.wright@doccraft",
   "Version": "1.0"
}
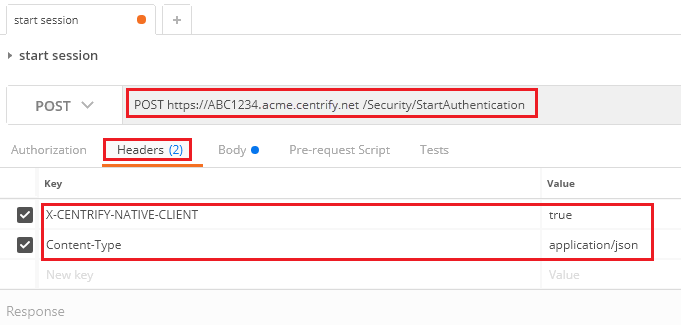
Your request header must contain X-CENTRIFY-NATIVE-CLIENT:true to indicate that an application is invoking the Centrify endpoint, and Content-Type: application/json to indicate that the body is in JSON format.
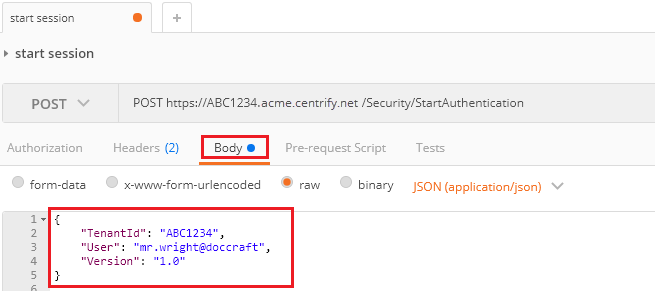
The body of your request must include the TenantID, User, and API Version elements. The server uses the TenantID and User to look up the user for the given tenant. If the user exists, the server returns the challenge to the client.
Sending the Request
To execute the request in Postman:
- Select the POST request type in the list and enter the endpoint URI.
- Select the Headers tab and enter each header on a separate line, as shown below:

- Select the Body tab and enter the JSON:

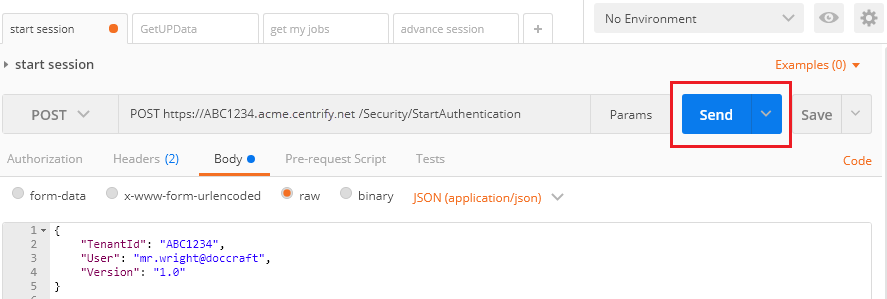
- Click Send to execute the request.

Retrieving the Response
After the server receives this request, it validates the user and tenant ID specified in the body and creates a response called an MFA package, which includes a session ID and an array of zero, one, or two authentication challenges for the client to fulfill. The server returns the MFA package as a response to the client. In Postman, the response is shown at the bottom of the screen.
The following sample shows a successful response to /Security/StartAuthentication. The response always includes a Challenges array:
{
    "ClientHints": {
        "PersistDefault": False,
        "AllowPersist": True,
        "AllowForgotPassword": False
    },
    "Version": "1.0",
    "SessionId": "1e5214e4-0921-4e9e-8ada-3ef2970f7c1f",
    "Challenges": [
        {
            "Mechanisms": [
                {
                    "AnswerType": "Text",
                    "Name": "UP",
                     "PromptSelectMech": "Password",
                     "PromptMechChosen": "Enter Password",
                    "MechanismId": "4a23390d-dee9-4ead-aa33-2bacd93f81fa"
                },
                {
                    "AnswerType": "Text",
                    "PartialDeviceAddress": "6098",
                    "Name": "SMS",
                    "MechanismId": "2bcddd0b-37b9-4a6b-b393-9cd03eb7c9aa"
                }
            ]
      }
    ],
    "Summary": "NewPackage",
    "TenantId": "ABC1234"
}
The response’s Challenges array contains up to two challenge elements, each corresponding to a challenge profile configured on the admin portal. Each element of Challenges contains an array called Mechanisms. Each field of a Mechanism contains data necessary for the client to present the mechanism to the user. The user must answer the mechanisms correctly to authenticate.
In the example above there are two elements in Mechanisms. The first element requires the user to enter a password. The second requires the user to verify through SMS. The number of Mechanisms present is based on how the administrator has configured CIAM, as well as the specific policies set for that user in the CIAM user portal. When two Challenges are present, your client application must iterate through each and choose one mechanism per challenge to present to the user.
The type of a given mechanism (e.g., password entry) is specified in the AnswerType element:
"Mechanisms": [
        {
                "AnswerType": "Text",
                "Name": "UP",
                "PromptSelectMech": "Password",
                "PromptMechChosen": "Enter Password",
                "MechanismId": "4a23390d-dee9-4ead-aa33-2bacd93f81fa"
        }
In the example above, AnswerType is set to Text, indicating that the user must enter a password for this mechanism. Depending on the type of mechanism, other elements may also be present. For example, the PromptSelectMech and PromptMechChose elements specify the prompt type and prompt text, respectively, to use with password entry. A client application uses this information to display the user interface for entering authorization credentials.
For example, if the user must enter a password, your client application could present an edit box for entering the password. If the user must respond to an SMS message sent to their smartphone, your client could display a message telling users to check their smartphone for a verification code, and then provide an edit box for entering this code.
The MechanismId identifies the mechanism, which is unique across all users and tenants. The client must specify this ID when advancing the authentication (described below) so that the server knows how to handle the mechanism for that user.
The SessionId uniquely identifies the web communications session between the client and server. The client must retain this value for use in subsequent API calls on behalf of the user.
Try the API in Postman:
.
Clickhere for help with using our sample Postman collection.
Updated 5 months ago
